Simple paper plates are one of the most versatile, budget-friendly, and accessible crafting staples available. With a pair of safety scissors, non-toxic paint, and basic scrap paper, a standard white plate transforms into an engaging canvas for imaginative play. Crafting helps toddlers, preschoolers, and young school-aged children develop fine motor control, scissor skills, and color recognition while sparking curiosity about the natural world.
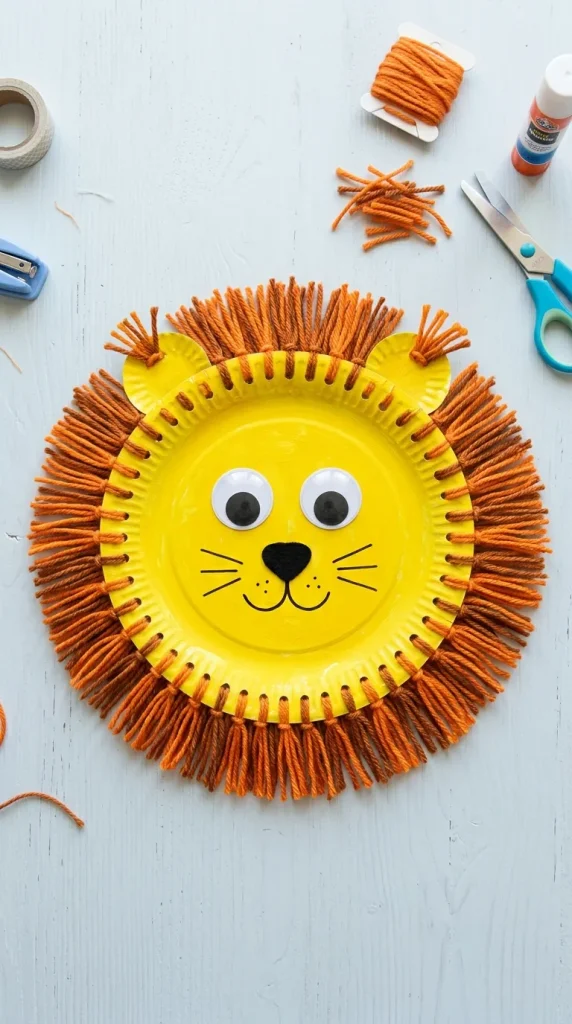
1. The Fluffy Yarn-Mane Lion
The King of the Jungle is a classic paper plate craft that introduces children to fine motor threading and snipping.
- How to Make It: Paint the bottom of a paper plate bright yellow or golden orange. Cut out circular yellow ears and a rounded cardstock muzzle. Once dry, glue googly eyes and draw on whiskers with a black marker. Punch small holes evenly around the outer rim of the plate, then invite kids to thread and tie strands of yellow, orange, and brown yarn through the holes to create a textured, wild mane. Alternatively, kids can cut short yarn pieces and glue them in layers around the rim.
2. The Interactive Swimming Aquarium Fish
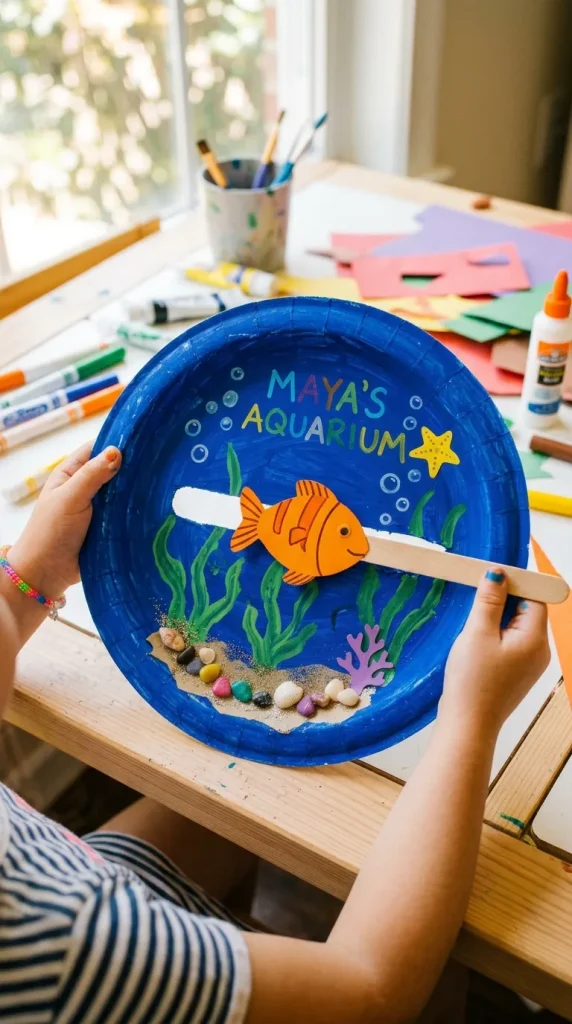
This kinetic craft allows children to actually move their fish through “water.”
- How to Make It: Paint one paper plate deep ocean blue with green seaweed accents. Cut a horizontal slit across the lower third of this plate. Paint a second paper plate vibrant orange or yellow, cut out a small oval fish shape, and decorate it with scales. Glue the mini fish to the top end of a wooden popsicle stick. Slide the stick through the slit of the blue plate so kids can slide the stick back and forth to make their fish swim across the reef.
3. The Colorful Mosaic Paper Plate Peacock
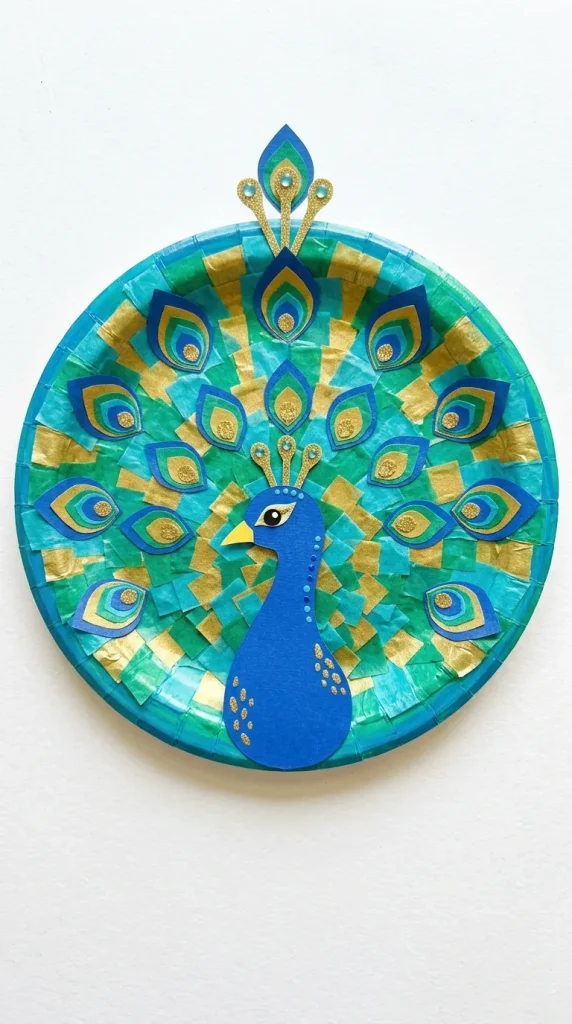
Mosaic projects are great for developing precision, hand-eye coordination, and patience.
- How to Make It: Cut out a bowling-pin shape from royal blue cardstock for the peacock’s head and body. Use the entire paper plate as the magnificent fan tail. Cut colorful squares or teardrop shapes from turquoise, emerald green, and gold tissue paper. Kids can brush a layer of glue over the paper plate and press down the tissue paper pieces, layering them like plumage. Top each section with small gold glitter dots or purple paper circles to mimic eye-feathers, then glue the blue body in the center.
4. The Curled-Tongue Jumping Frog
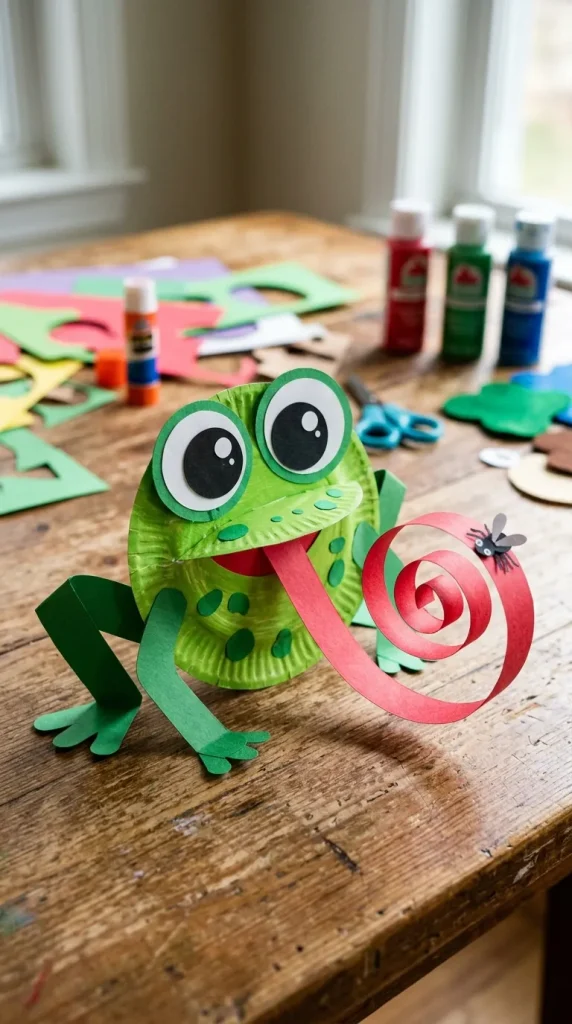
Bring dynamic 3D elements to life with a playful frog catching a fly.
- How to Make It: Paint the outer base of a paper plate bright green. Cut two large green circles with white and black inner circles for large bulging eyes, and glue them to the top rim. Cut a long strip of red construction paper, wrap it tightly around a pencil to curl it like a spring, and glue one end to the center of the frog’s mouth. Glue a small black paper “fly” to the tip of the coiled tongue for an expressive, storybook finish.
5. The Rocking Curved Toucan
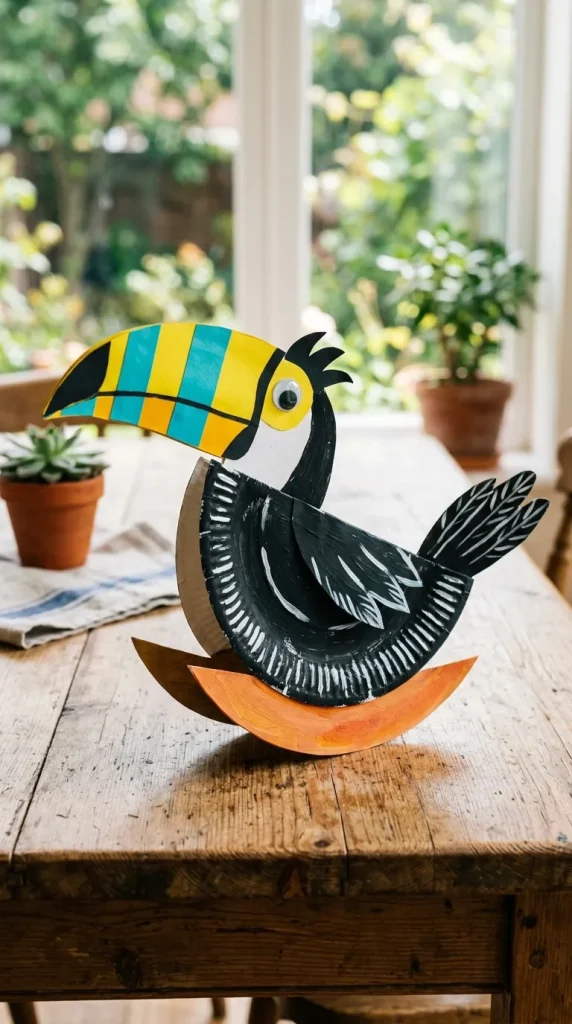
Using the curved shape of a folded paper plate creates a self-balancing toy that rocks back and forth.
- How to Make It: Fold an uncoated paper plate directly in half. Paint the exterior black with a large white semicircular patch near the front for the chest. Cut a dramatic, oversized toucan bill out of yellow cardstock and paint the tip with red and turquoise stripes. Glue the bill to the front crease and add a large googly eye. When set on a flat table, the curved folded base allows the toucan to bob and rock when gently tapped.
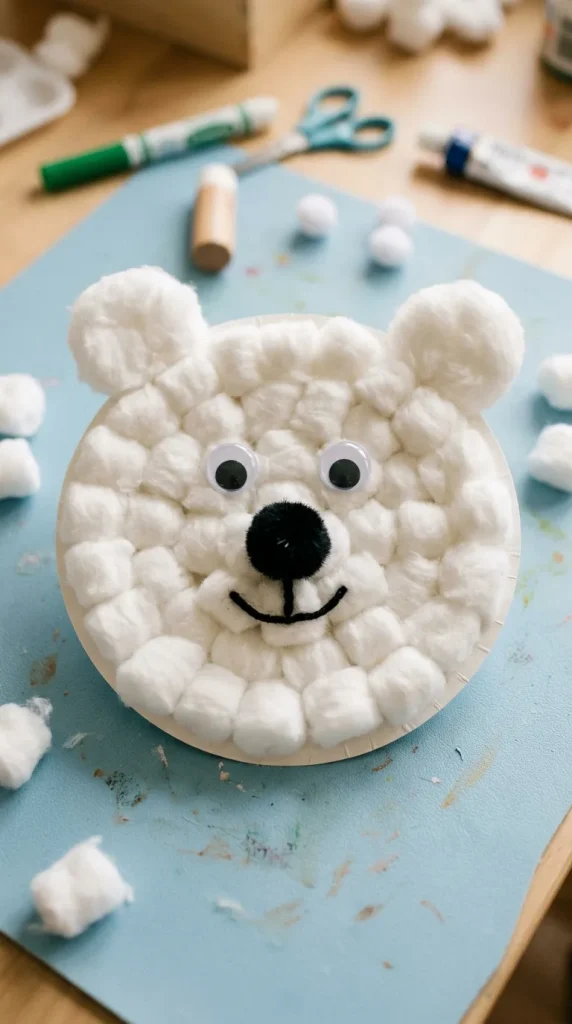
6. The Textured Cotton Ball Polar Bear
Sensory crafting gives younger toddlers a tactile medium to explore textures and shapes.
- How to Make It: Keep the base paper plate white. Provide kids with a shallow bowl of craft glue and a handful of fluffy cotton balls. Let them gently stretch the cotton balls and press them all over the plate until it is completely soft and covered. Cut two semicircular ears from white paper with pink centers and glue them underneath the top rim. Finish with two large button eyes and a large black pom-pom nose glued in the center.
7. The Twirling Ribbon Jellyfish
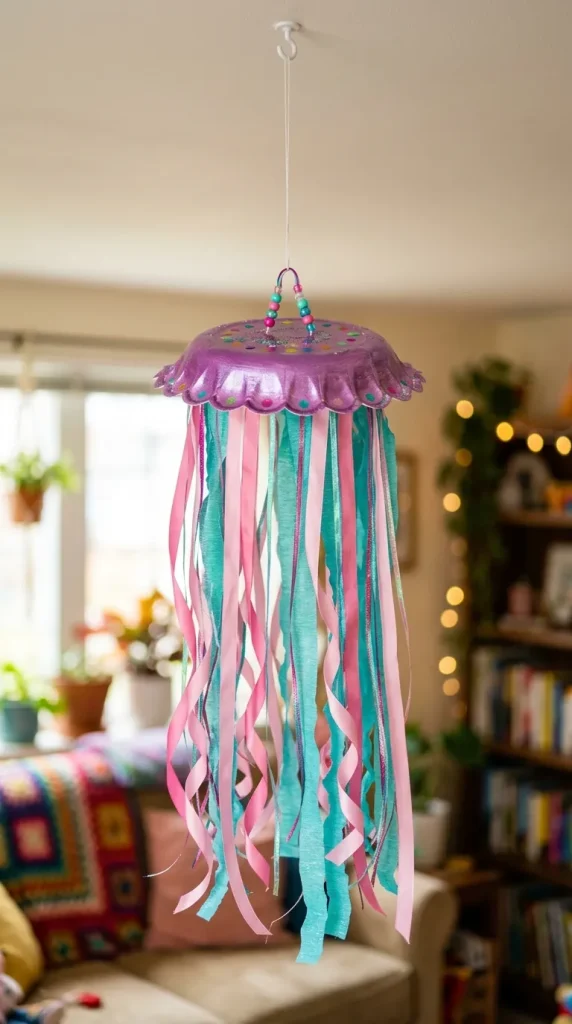
Hanging crafts make vibrant bedroom or classroom decorations that dance with the breeze.
- How to Make It: Cut a paper plate in half horizontally with a scalloped or wavy edge. Paint the half-plate in shimmering shades of purple, turquoise, or pink. Flip the plate over and attach varying lengths of iridescent ribbons, lace scraps, and crepe paper streamers along the bottom flat edge. Punch a hole at the top of the plate dome, thread a loop of string, and hang the finished jellyfish near a window or ceiling fan.
8. The Folded Paper Hedgehog
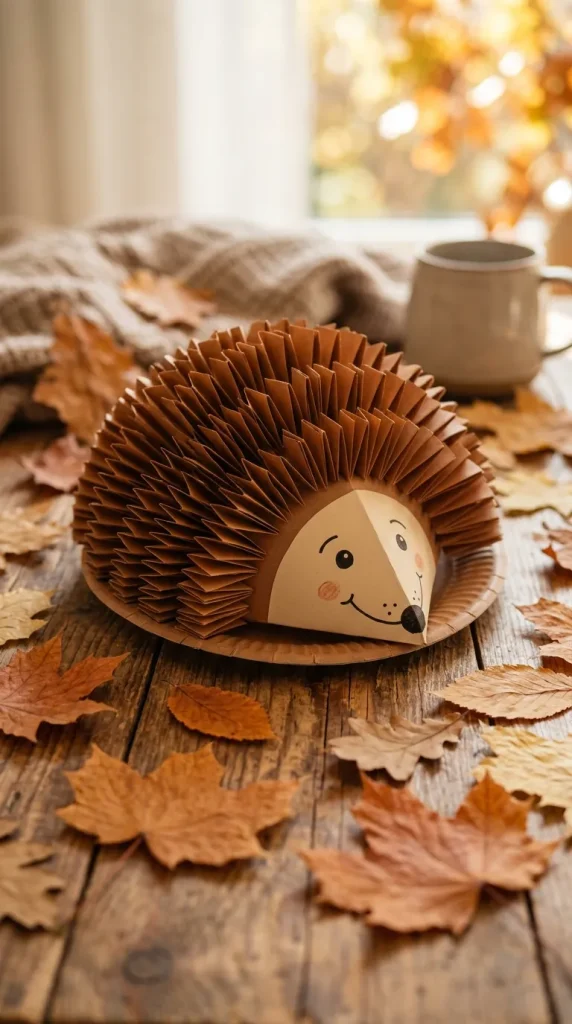
This forest creature utilizes basic accordion-folding techniques to introduce geometric shapes and depth.
- How to Make It: Cut a paper plate in half and paint it warm brown. Cut out a pointed triangular snout from beige construction paper and draw on a friendly eye, smile, and dark nose. To make the spines, cut multiple strips of dark brown and tan paper, fold them into zig-zags (accordion style), and glue them overlapping across the curved back of the plate. Alternatively, small brown triangles or real collected autumn leaves can be layered for spikes.
9. The Sweet Spotted Ladybug Mask
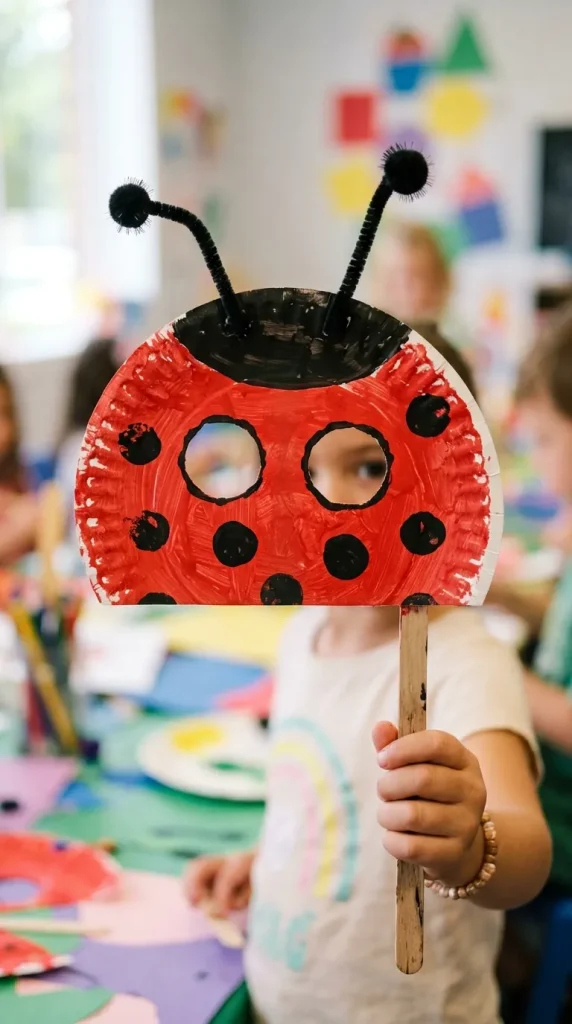
Costume crafts double as wearable imaginative props for play and storytelling.
- How to Make It: Cut a paper plate in half. On the straight bottom edge, cut two round eye-holes spaced evenly apart for a child’s vision. Paint the rest of the half-plate bright red. Once dry, let kids stamp on black circle spots using black tempera paint and a round sponge or their own fingertips. Glue two black pipe-cleaner antennae with small red pom-poms to the top rim. Attach a sturdy wooden craft stick to one bottom corner so kids can hold it up like a masquerade mask.
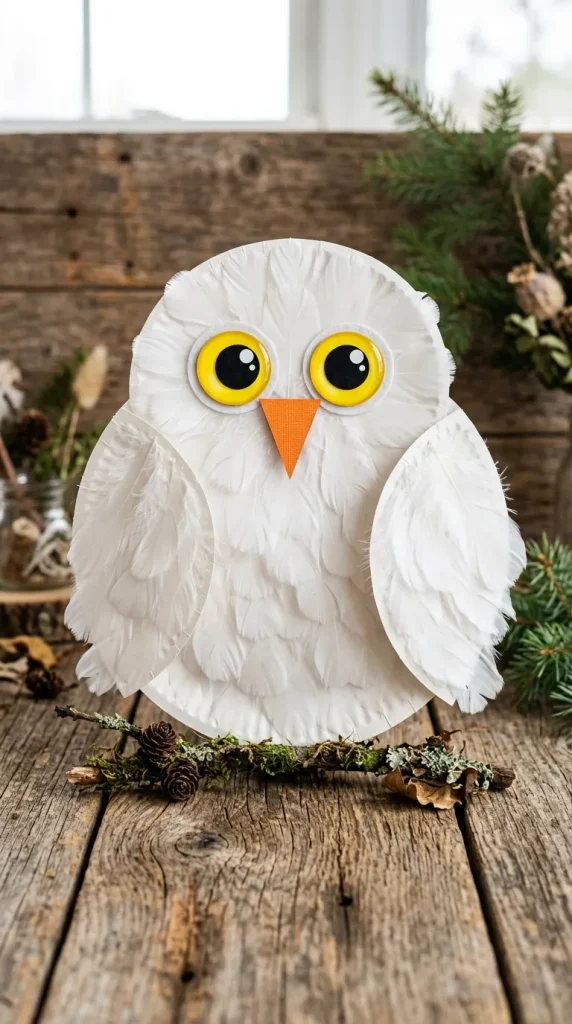
10. The Layered Feather Snowy Owl
Combine scrap materials with basic cuts to build a soft woodland night flyer.
- How to Make It: Cut the left and right curved rims off a paper plate to form two pointed wing shapes, leaving a rounded triangle center for the owl’s body. Paint the body soft gray or leave it crisp white. Glue the two cut rims backward onto each side of the body to form arched wings. Cut two oversized bright yellow circles with large black centers for wide night-vision eyes. Glue overlapping white craft feathers across the chest and finish with a small orange paper triangle beak.
Tips for a Stress-Free Crafting Session
- Prep Work Surfaces: Cover your table with reusable silicone baking mats, flattened grocery bags, or butcher paper for effortless cleanup.
- Encourage Creative Freedom: Encourage children to choose their own color palettes and experiment with asymmetric patterns rather than aiming for identical copies.
- Drying Stations: Keep a dedicated baking tray or flat cardboard box nearby where wet, painted plates can dry undisturbed before assembling details.